
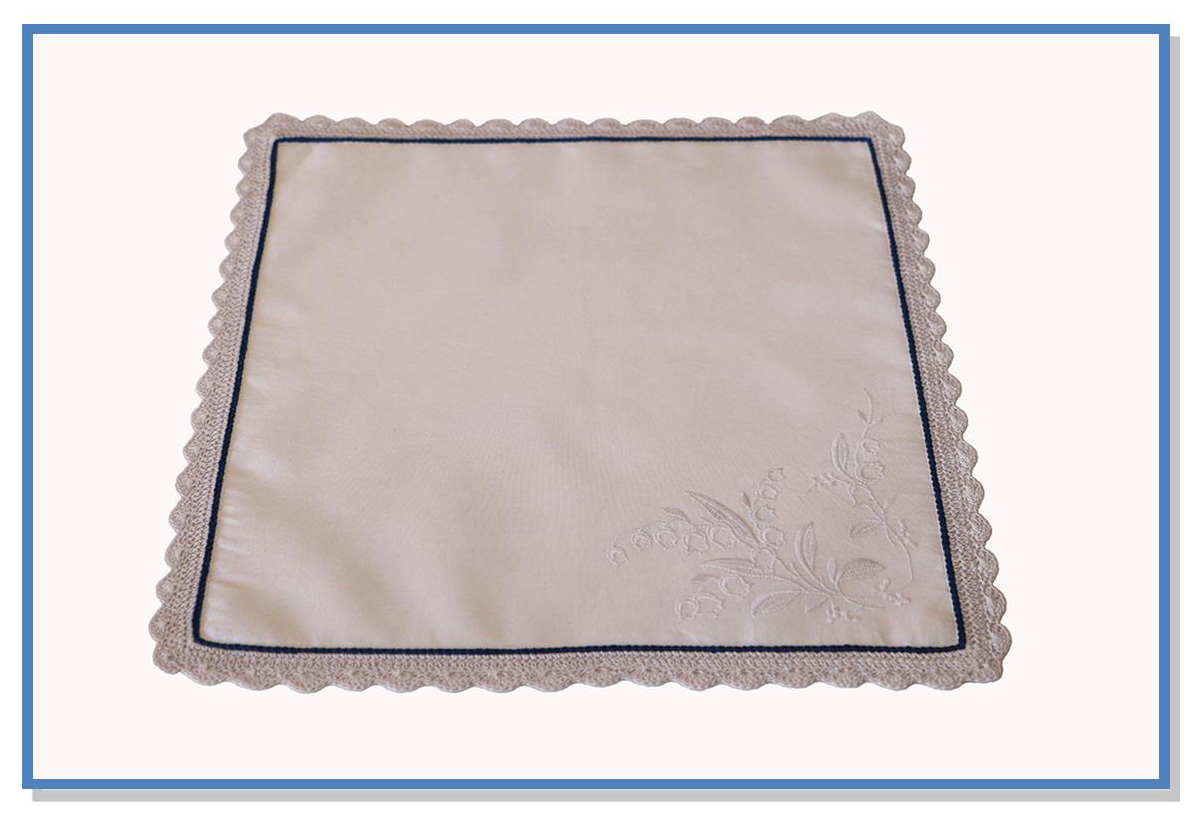
Crochet Edge and Embroidered Bridal Wedding Handkerchief
I’ve been thinking about trying my hand at customizing a bridal wedding handkerchief which I accomplished and it was a success! THE BRIDE LOVED IT!
I have a few hemstitched handkerchiefs which I purchased a few years back. The reason I chose the hemstitched handkerchiefs was so I could add a crochet edging. Normally, a tatting edging would look a lot better than the crochet edging but I’m not quite sure how to tat. My grandmother use to tat these handkerchiefs back in the day. I remember growing up and she would give them to us as gifts. They were beautiful!
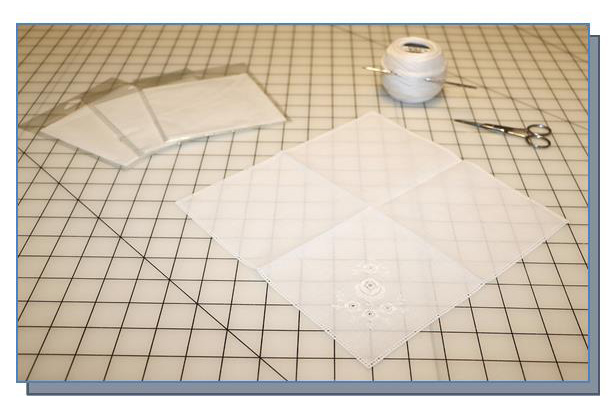
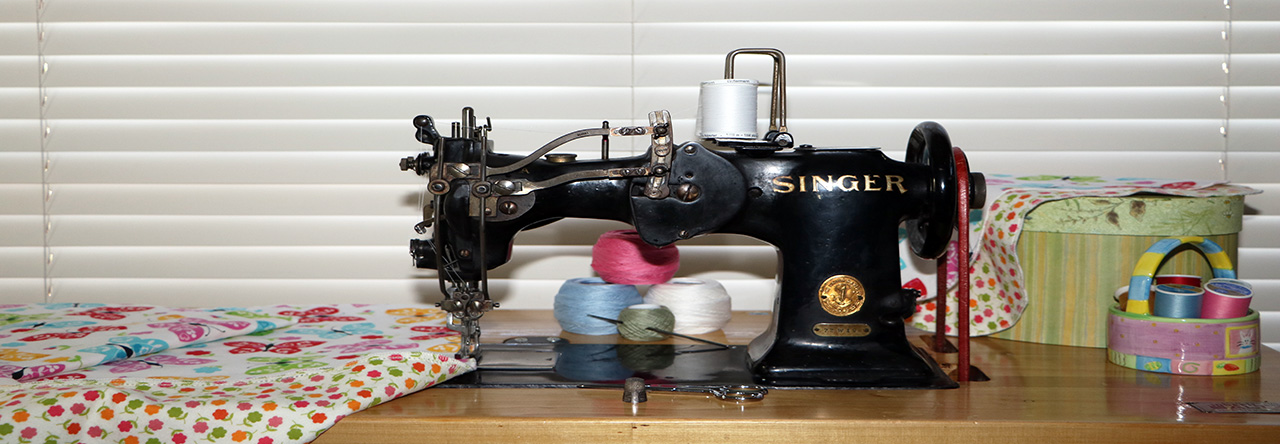
First, I decided to go ahead with a white crochet edging so I would be able to dye the edging as well. I used a DMC Cebelia Blanc #10 which is a superior quality crochet thread made from combed cotton. DMC Cebelia is 100% colorfast and fade resistant. During the manufacturing process, the thread is combed, singed by flame and then double mercerized. It is this double mercerizing which gives it its brilliance and strength. I used a modified shell as the edging to finish this wedding handkerchief.
Modified Shell Crochet Edging Pattern Instructions:
Round 1: With the right side facing you join thread in any hole, ch 1, sc in same hemstitched hole, and continue around the handkerchief and join with a ss into the first sc.
Round 2: Ch 1, sc in same sc, *skip 2 sc, 3 dc, 1 ch, 3 dc in the next st, skip 2 sc, sc into the next sc, repeat from * around and join with a ss to the first sc, finish off.
Abbreviations:
ch = chain(s), dc = double crochet, sc – single crochet, ss = slip stitch, st = stitch
Notes: 1. You may have to adjust the last set of stitches between the * as you come to the first sc.
2. When finishing off I normally knot the two end threads and proceed to knot the individual threads so not to be seen. Normally, when finishing off you would just pull thread through stitches to hide the thread ends. However, I personally like to knot the ends so they will not come enweaved during washings.
Dye Bath Process:
Kyndall’s wedding colors are taupe and navy, so I went on line to The Rit Studio and checked out their color chart of dyes. I’m including a link of their color chart for you to view. On page 32, number 459, (taupe) is the color dye I chose for the handkerchief.
https://www.ritstudio.com/wp-content/uploads/2014/03/ColorRit_FINAL.pdf
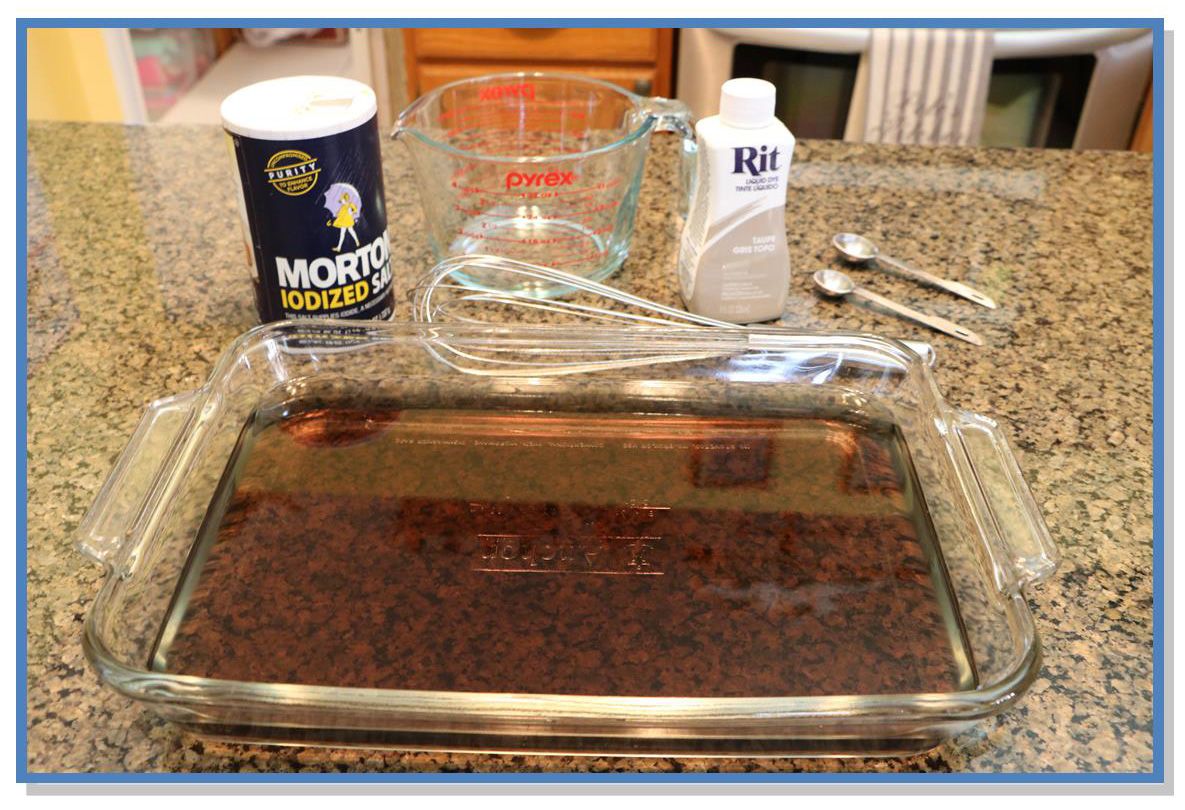
I decided to go with the liquid dye since I was just dying a handkerchief. Be sure to read the instructions carefully on pages 2 and 3 of the Rit Studio download. The instructions for the dye bath call for ¼ tsp of the Taupe Rit dye to 1 cup of hot water. I mixed 1 ¼ tsps of the dye and 5 cups of hot water and ½ tsp of salt in a Pyrex baking dish and carefully whisked the water, dye and salt together. I needed to saturate the handkerchief in warm water before placing it into the dye bath so the color would blend evenly. If you don’t you might have splotches of mixed color on the handkerchief. I carefully placed the saturated handkerchief in the dye mixture and making sure it submerged completely. I waited about 3 minutes then checked the handkerchief for the color. The white handkerchief with the white crochet edging were the perfect taupe color I was looking for! The longer you leave it in the dye bath the deeper the color becomes.
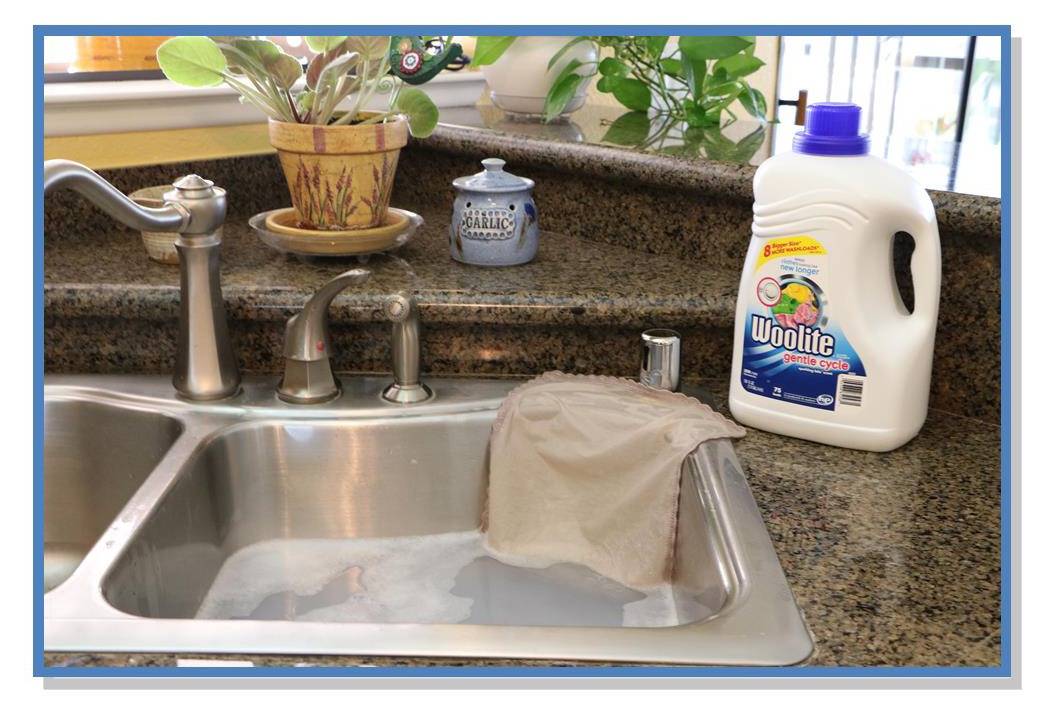
After removing the handkerchief from the dye bath I laid it flat to dry. After drying I washed the handkerchief in cold water with Woolite and again laid it flat to dry.
Crochet Edging Border:
I wanted to add a navy color to the crochet edging to give the handkerchief a little more color. DMC does not carry a navy thread color so I went with Aunt Lydia’s #10 Crochet Thread in Navy and added a border along the hemstitched holes. To do this stitch facing the front side of the handkerchief you just need to do a single crochet through each hemstitch hole along the handkerchief and when you come to the end, bring the crochet thread through to the back side of the handkerchief and know the ends and tie off.
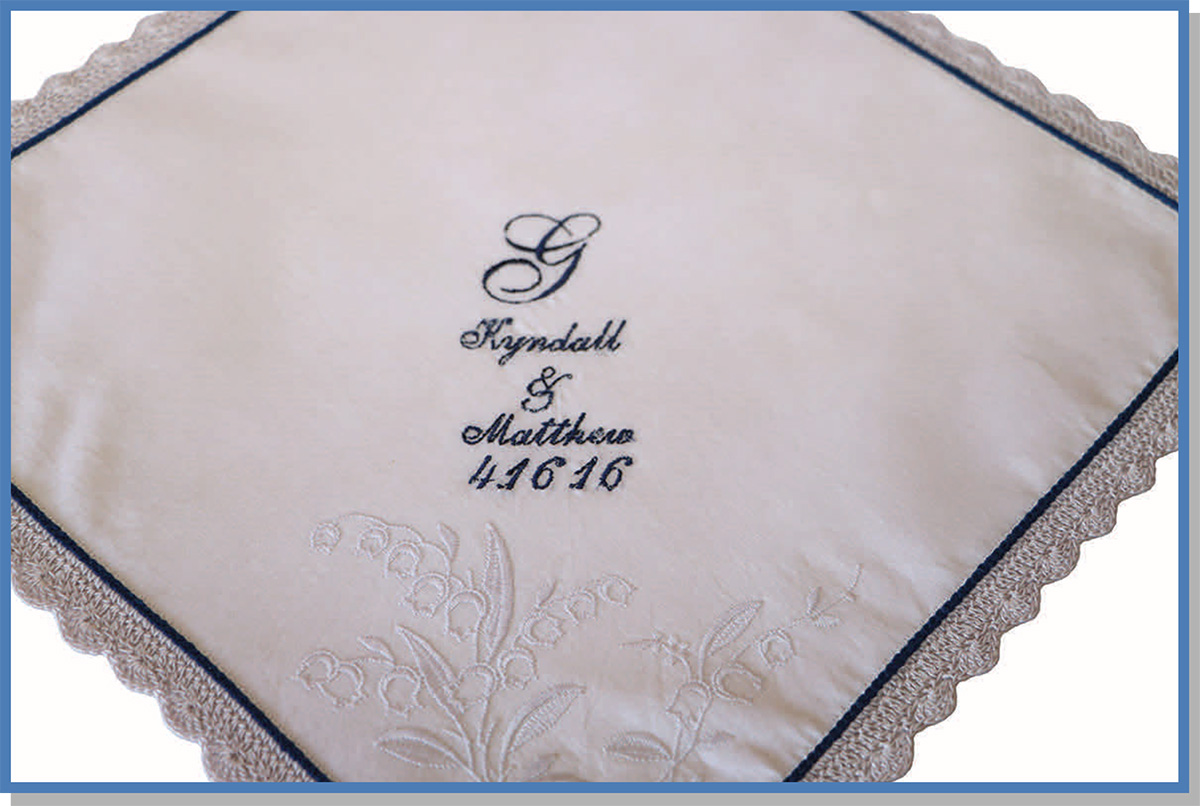
Machine Embroidery Design:
Now, for the final touch to apply a navy embroidery design! I experimented with different types of fonts and sizes and tested each design before applying the machine embroidery design to the handkerchief. I never thought I would find the right size and design to complement the handkerchief and it finally came together! What are your thoughts on this beautiful crochet edge embroidered bridal wedding handkerchief?
Please leave your comments or suggestions for the next time I attempt another handkerchief.


Leave a Reply